Shine Time Car Wash
Related Articles

The proper maintenance of a foam cannon is crucial for achieving optimal performance and longevity. Whether you are a car enthusiast or a professional detailer, understanding the essential tips for maintaining your foam cannon can greatly enhance its effectiveness in providing a thorough and efficient car wash experience. For instance, imagine a scenario where an automotive detailing business invests in top-of-the-line foam cannons to deliver exceptional results to their customers. However, due to inadequate maintenance practices, these expensive tools quickly deteriorate, resulting in subpar foam generation and reduced overall productivity. To avoid such costly setbacks, it is imperative to follow proper maintenance procedures consistently.
Maintaining a foam cannon involves several key steps that should not be overlooked. Firstly, regular cleaning of the foam cannon’s components is vital for ensuring optimal functionality. This includes disassembling the unit and thoroughly washing each part with mild detergent and warm water to remove any dirt or chemical residue that may have accumulated during use. Additionally, inspecting the O-rings for signs of wear or damage is crucial as they play a critical role in preventing leaks and establishing an effective seal between the different parts of the foam cannon. By regularly examining and replacing worn-out O-rings, potential issues can be addressed proactively before they escalate into more significant problems that could compromise the performance of the foam cannon.
Another important aspect of foam cannon maintenance is proper storage. After each use, it is essential to fully rinse and dry all components before storing them in a clean and dry area. This helps prevent the buildup of residue or mold that can negatively impact the foam cannon’s performance over time. Additionally, storing the foam cannon in a protective case or bag can further safeguard it from potential damage during transportation or when not in use.
In addition to regular cleaning and proper storage, using high-quality and compatible cleaning solutions is crucial for maintaining the longevity of your foam cannon. It is recommended to follow the manufacturer’s guidelines regarding which cleaning products are safe to use with your specific foam cannon model. Using harsh chemicals or detergents that are not suitable for foam cannons can cause damage to its internal components, resulting in reduced foam generation or even complete malfunction.
Lastly, conducting routine inspections and testing of your foam cannon can help identify any potential issues early on. Regularly check for any leaks, clogs, or signs of wear that may affect its performance. Testing the spray pattern and adjusting the nozzle settings as needed ensures consistent and optimal foam coverage during car washing.
By following these essential tips for maintaining your foam cannon, you can maximize its effectiveness, prolong its lifespan, and ensure a high-quality car wash experience every time. Remember to consult the manufacturer’s instructions specific to your foam cannon model for detailed maintenance procedures and guidelines.
Choosing the right soap for your foam cannon
Choosing the right soap for your foam cannon is crucial in ensuring effective and efficient car washing. The soap you use will directly impact the quality of foam produced, as well as its cleaning power. To guide you in making an informed decision, let’s explore some key factors to consider when selecting a soap for your foam cannon.
Firstly, it is important to choose a soap that is specifically formulated for use with foam cannons. These soaps are designed to create thick and rich foams that cling to the surface of your vehicle, allowing for better cleaning and lubrication during the wash process. Using regular dishwashing or household soaps may produce minimal foam or result in thin and weak suds, leading to less effective cleaning.
Secondly, consider the pH level of the soap. Ideally, opt for a neutral or slightly alkaline soap with a pH range between 6-8. Soaps within this range are gentle on your vehicle’s paintwork while still effectively removing dirt and grime. Avoid using highly acidic or caustic soaps as they can damage the paint finish over time.
Additionally, take into account any special features offered by certain soaps. Some foaming car wash solutions contain additional additives such as wax or gloss enhancers that provide extra protection and shine to your vehicle’s surfaces. These added benefits can significantly enhance the overall appearance of your car after each wash.
In summary, choosing the right soap for your foam cannon involves considering its compatibility with foam cannons, checking its pH level for gentleness on paintwork, and exploring any additional features that may be beneficial to your desired results.
Next section: Properly diluting the soap and water mixture
Properly diluting the soap and water mixture
After understanding the importance of choosing the right soap for your foam cannon, let’s now delve into another crucial aspect of maintaining a foam cannon – properly diluting the soap and water mixture. To illustrate this point, consider the following scenario:
Imagine you have just purchased a new foam cannon and are excited to try it out on your car. You diligently follow the instructions provided by the manufacturer and mix the recommended amount of soap with water in the designated container. However, when you begin spraying, you notice that the foam is either too thick or too thin, resulting in an ineffective cleaning process.
To avoid encountering such issues, here are some essential tips for properly diluting the soap and water mixture in your foam cannon:
-
Measure accurately: It is crucial to measure both the quantity of soap and water precisely. Using more or less than what is required can alter the consistency of the foam produced by your foam cannon. Utilize measuring cups or scales to ensure accurate measurements.
-
Adjust according to desired results: Different scenarios may call for different levels of foam thickness. If you prefer a thicker layer of foam for better coverage and increased dwell time, increase the concentration of soap slightly while keeping within safe limits specified by manufacturers. Conversely, if you require less aggressive cleaning action or want to conserve product usage, decrease soap concentration accordingly.
-
Test before use: Before applying the diluted solution onto your vehicle’s surface, conduct a small test area on an inconspicuous part of your car. This will help determine if any adjustments need to be made before proceeding with full-scale application.
Now imagine how these tips could make your car washing experience more efficient and satisfying:
| Benefits | Description |
|---|---|
| Enhanced Cleaning Power | Properly diluted solutions maximize effectiveness, ensuring thorough removal of dirt and grime from surfaces. |
| Improved Foam Consistency | Achieving optimal foam thickness provides better coverage and longer dwell time, allowing the soap to break down contaminants more effectively. |
| Cost Efficiency | Accurate dilution ratios prevent wastage of expensive soap products and help you get the most out of every wash. |
| Convenience | By following proper dilution techniques, you can save time by avoiding the need for excessive reapplications or adjustments during the cleaning process. |
By adhering to these guidelines, you will be able to make the most out of your foam cannon and achieve exceptional results when washing your car.
Beyond ensuring a properly diluted mixture, another crucial step in maximizing the effectiveness of your foam cannon is pre-rinsing the vehicle before applying foam. Let’s explore this essential aspect further
Pre-rinsing the vehicle before applying foam
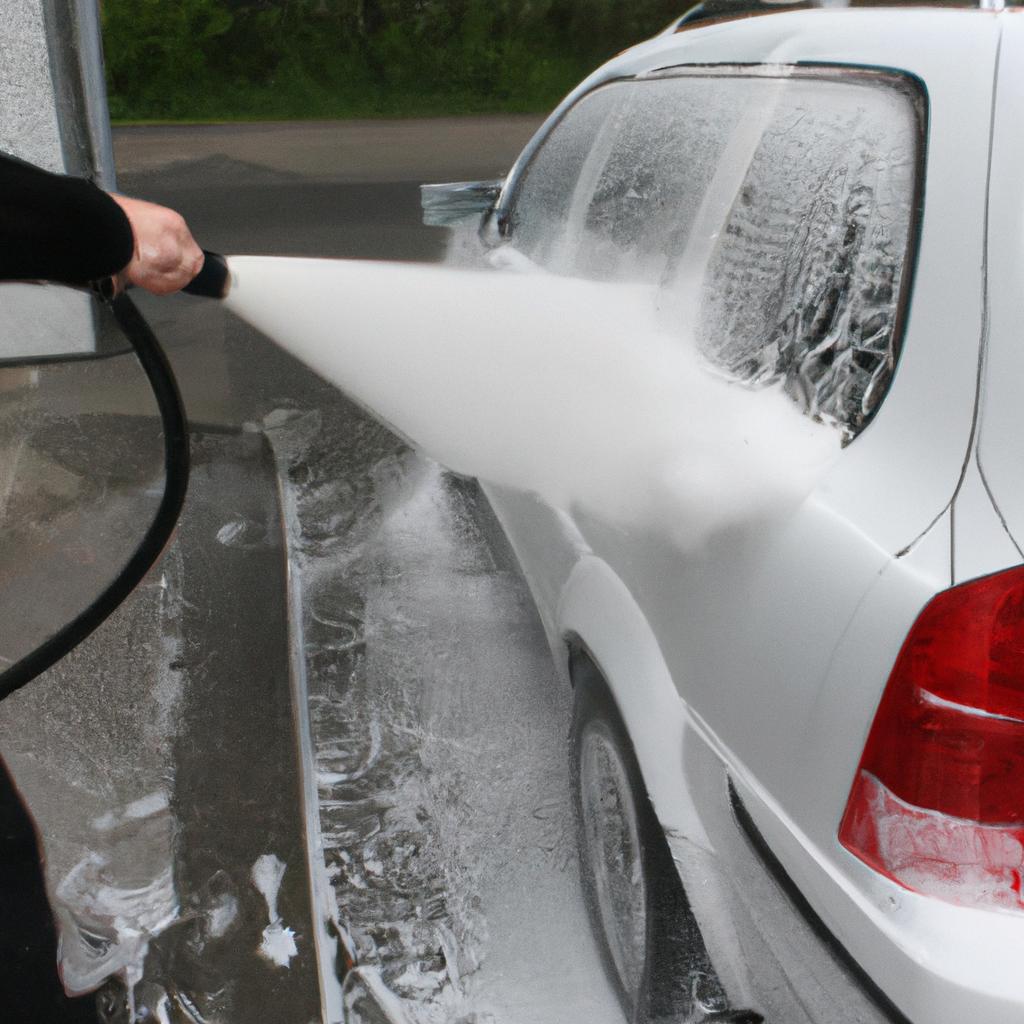
After properly diluting the soap and water mixture, the next crucial step in maintaining a foam cannon is pre-rinsing the vehicle before applying foam. This ensures that any loose dirt or debris on the surface of the car is removed, allowing for a more effective and efficient foam application.
One example to illustrate this point is when washing a particularly dirty car with mud or sand on its exterior. If the vehicle is not pre-rinsed, these particles can become trapped in the foam, potentially causing scratches or swirl marks during the subsequent wash process. By thoroughly rinsing off such contaminants beforehand, you can minimize the risk of damaging your vehicle’s paintwork.
To pre-rinse your vehicle effectively, follow these essential tips:
- Start by using a hose or pressure washer to wet down the entire surface of the car.
- Pay extra attention to areas where dirt tends to accumulate, such as wheel wells and lower body panels.
- Use a nozzle attachment with an adjustable spray pattern to ensure adequate coverage while conserving water.
- Work from top to bottom, allowing gravity to help carry away loosened dirt and grime.
By following these steps, you can remove larger debris from your car’s surface before applying foam, resulting in a cleaner and safer wash experience.
Now let’s delve into another important aspect of proper maintenance: using the correct settings on your foam cannon.
Using the correct foam cannon settings
Building on the importance of properly pre-rinsing the vehicle before applying foam, let us now delve into another crucial aspect of maintaining a foam cannon: using the correct settings. Understanding and adjusting these settings appropriately is essential for achieving optimal foam coverage and ensuring an effective car wash experience.
Example: For instance, consider a scenario where an individual uses their foam cannon with incorrect settings. They may inadvertently set it to produce too much foam density or use excessive pressure, resulting in wastage of detergent and potential damage to the vehicle’s paintwork. On the other hand, if the settings are too low, insufficient foam may be generated, leading to inadequate cleaning power and poor results.
To avoid such issues, here are some key tips for adjusting your foam cannon settings effectively:
-
Foam Density: Adjusting the knob or dial on your foam cannon allows you to control the thickness or density of the foam produced. Start by setting it at a medium level and observe how well it adheres to the vehicle’s surface during application. Fine-tune as necessary based on personal preference and desired cleaning effectiveness.
-
Pressure Adjustment: Depending on your specific foam cannon model, you may have options to adjust both air pressure and water pressure separately. Finding the right balance between these two factors ensures proper foaming action without causing any harm to delicate parts of the vehicle like mirrors or antennas.
-
Spray Pattern Selection: Some foam cannons offer different spray patterns such as fan-shaped or cone-shaped sprays. Experiment with these variations to determine which pattern provides better coverage across different areas of your vehicle, enabling thorough cleaning while minimizing product waste.
-
Flow Rate Control: Controlling the flow rate from your hose connection helps regulate how quickly detergent is mixed with water within the foam cannon unit. Adjusting this flow rate can impact both foam generation and consumption rates – finding an appropriate balance will ensure efficient use of resources while maximizing cleaning performance.
| Setting | Purpose |
|---|---|
| Foam Density | Controls the thickness of foam produced |
| Pressure | Adjusts air and water pressure |
| Spray Pattern | Determines the shape of the spray |
| Flow Rate | Regulates detergent-water mixture flow |
By understanding and implementing these guidelines for adjusting your foam cannon settings, you can optimize its performance during car washes, ensuring effective cleaning while minimizing wastage.
With a solid grasp on using correct foam cannon settings established, let us now shift our focus to another important aspect – cleaning and storing the foam cannon after use.
Cleaning and storing the foam cannon after use
Transitioning from using the correct foam cannon settings, it is crucial to understand the importance of proper maintenance in ensuring optimal performance and longevity. To illustrate this point, let’s consider a hypothetical scenario where an automobile detailing business neglects regular maintenance of their foam cannon. Over time, they notice a decline in foam quality during car washes, resulting in dissatisfied customers and decreased revenue.
To prevent such issues and maintain peak performance of your foam cannon, here are some essential tips for effective maintenance:
-
Thoroughly clean the foam cannon after each use:
- Rinse off any remaining soap or detergent residue.
- Use a soft brush or sponge to remove stubborn dirt or debris.
- Ensure all nozzles and connectors are free from clogs by flushing with water.
- Wipe down the exterior with a damp cloth to keep it looking pristine.
-
Inspect and replace worn-out components regularly:
Component Signs of Wear Nozzle Reduced spray pattern Filter Clogging or discoloration O-rings Cracks or deformities Connectors Leaks or loose fittings -
Lubricate moving parts as needed:
- Apply silicone lubricant on o-rings and other seals to prevent drying out and cracking.
- Regularly check screws and bolts for tightness to ensure stability during operation.
By following these maintenance practices, you can extend the lifespan of your foam cannon while consistently achieving high-quality foaming results. Neglecting proper upkeep not only compromises performance but also risks costly repairs or premature replacement.
Looking ahead, we will delve into another critical aspect of maintaining your foam cannon: regularly inspecting and maintaining its various components.
Regularly inspecting and maintaining foam cannon components
Maintaining the foam cannon after use is crucial for its longevity and optimal performance. Cleaning and storing the foam cannon properly will ensure that it remains in good condition and ready for future car washes.
One common mistake people make is neglecting to clean the foam cannon thoroughly after each use. Failure to do so can result in residue buildup, clogged nozzles, and reduced foaming ability. To prevent this, follow these steps when cleaning your foam cannon:
-
Rinse: Start by rinsing out any remaining soap or detergent from the foam cannon. This can be done by attaching a water hose to the foam cannon and running water through it until all traces of soap are removed.
-
Disassemble: Take apart the different components of the foam cannon, such as the nozzle, bottle, and connector. Refer to the manufacturer’s instructions if needed. Clean each component separately using warm soapy water and a brush or sponge.
-
Remove residue: Pay special attention to removing any residue or build-up from the nozzle and other small parts of the foam cannon. Use a toothbrush or pipe cleaner to reach into narrow crevices and ensure thorough cleansing.
Once you have cleaned all the components, allow them to air dry completely before reassembling the foam cannon for storage. It is important not to store a damp or wet foam cannon as this can lead to mold growth or corrosion.
To help you visualize how proper maintenance contributes to keeping your foam cannon in optimal condition, consider this example:
Case Study:
John regularly cleans his car using a foam cannon but often neglects proper maintenance afterward. Over time, he notices that his foam cannon starts producing less dense foam, resulting in an ineffective car washing experience. John realizes that he has been overlooking essential cleaning practices and decides to adopt a more structured approach towards maintaining his equipment.
By implementing regular cleaning routines outlined above, John manages to restore his foam cannon’s functionality back to its original state. He realizes the importance of proper maintenance in ensuring consistent performance and decides to follow these practices diligently.
In conclusion, cleaning and proper storage are vital for maintaining your foam cannon’s effectiveness. By following the steps mentioned above, you can extend its lifespan and ensure optimal foaming ability during future car washes. Remember that a well-maintained foam cannon will provide satisfying results while keeping your car looking clean and shiny.
Tips for Proper Foam Cannon Maintenance:
- Clean thoroughly after each use
- Disassemble and clean all components separately
- Remove residue from nozzles and small parts
- Allow all components to air dry completely before storing
| Cleaning Steps | Benefits |
|---|---|
| Rinse | Removes soap residue |
| Disassemble | Allows thorough cleaning |
| Remove residue | Prevents clogs or reduced foaming |
| Air dry | Prevents mold growth or corrosion |
(Note: The table presents an overview of the highlighted benefits associated with each cleaning step.)